If you’re looking for a sleek, modern undermount sink to enhance your kitchen or bathroom, look no further! Here’s how to install an undermount sink, covering everything from gathering materials and tools to finishing the job. Whether you’re a DIY expert or a novice, our clear instructions and helpful tips will ensure a successful installation.
So, if you’re ready to upgrade your space, let’s get started!
What is an Undermount Basin?
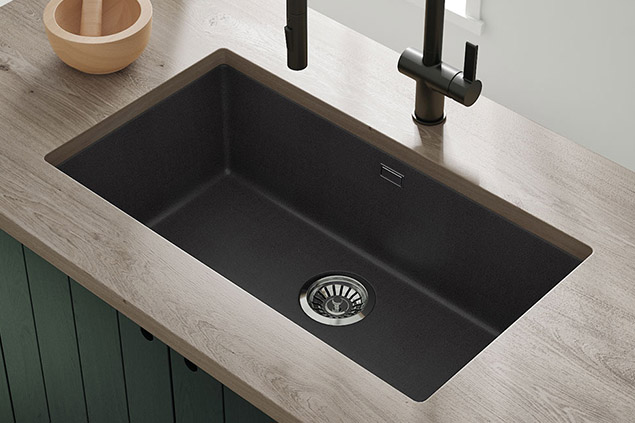
Undermount sinks, also known as undermount basins, are sinks that are installed underneath a countertop. Unlike traditional top-mount sinks, which sit on top of the countertop and have a rim that extends above the surface, undermount sinks are installed under the countertop and do not have a visible rim. There is no seam between the sink and countertop, with only edges sitting flush with the counter, creating a sleek, modern appearance that is popular with kitchens and bathrooms. Apart from being easy to clean due to the totally seamless design, undermount basins are available in a wide range of materials, including ceramic, granite, and stainless steel.
The use of undermount sinks is common in modern and contemporary design styles since they are generally considered more aesthetically pleasing than top-mount sinks. It is, however, more challenging to install them, since the countertop must be precisely cut and mounting clips or brackets must be used to secure the sink.
Undermount Sink Installation Guide (With Clear Steps)
Undermount sinks are easy to install if you possess the right tools and skills. Here are the steps to follow for installing undermount sinks in existing countertop:
1. Gather all the necessary tools and materials
Installing a sink requires a drill, drill bits, silicone sealant, mounting clips, a sink template (if provided by the manufacturer), and a circular saw or jigsaw. A diamond blade may be needed if the sink will be installed on a quartz countertop.
2. Measure and mark the sink cutout on the countertop
To ensure an accurate cutout, place the sink template on the countertop and trace the outline. If you do not have a sink template, measure and mark the cutout using the sink’s dimensions.
3. Cut out the sinkhole
Create the sinkhole by cutting along the traced line with a jigsaw or circular saw. If you’re cutting quartz, ensure you use a diamond blade to ensure a clean cut.
4. Install the mounting clips
Most undermount sinks come with mounting clips that help secure the sink to the countertop. Follow the manufacturer’s instructions for installing the clips.
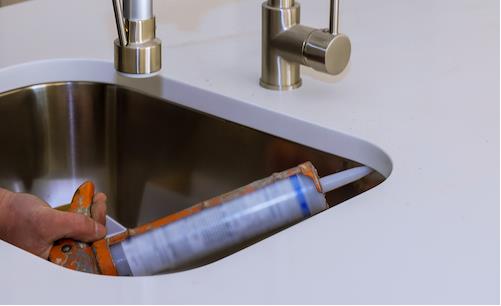
5. Apply silicone sealant to the underside of the sink rim
A continuous bead of sealant, smoothed out with a silicone tool or your finger, will help to create a watertight seal between the sink and the countertop.
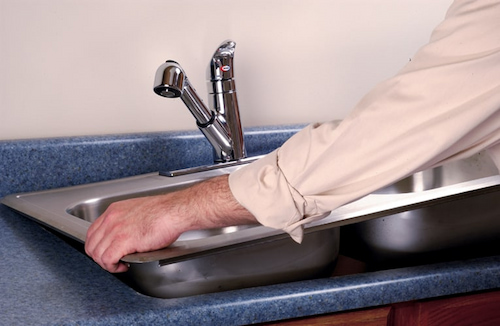
6. Position the sink in the sinkhole and press it down firmly
You should also check that the sink is properly aligned and seated in the hole. If there are any mounting clips loose or missing, fix them as soon as possible.
7. Secure the sink to the countertop using the mounting clips
Tighten the clips according to the manufacturer’s instructions to ensure a secure hold. Be sure to apply the appropriate torque to the clips and space them evenly around the sink rim.
8. Connect the plumbing
Connect the sink to the water supply and drain lines according to the manufacturer’s instructions. Tighten all connections securely, and test the sink for leaks.
The installation of an undermount sink can sometimes be problematic, particularly if it is not properly aligned or secured to the countertop. The common undermount sink problems you may encounter during installation and later use may include water leaks, sink detachment, surface scratches, and undermount sink clog alike. So please use the right tools and materials when installing and be careful to follow the manufacturer’s installation instructions to avoid these problems. Consult a professional plumber, kitchen installer, or manufacturer if you experience any problems during the installation process.
The Cost of Installing an Undermount Sink
Undermount sink installation costs are not always the same. Generally speaking, you can expect undermount sink installation costs to range from $200 to $400 if you hire a professional. If you are installing an undermount bathroom sink, you can expect to pay on the lower end of this range, while a larger, more complex kitchen sink installation will be at the higher end.
Several factors, such as the type of sink you choose, its size, and how complicated the installation is, can influence the cost of installing an undermount sink. Here are some factors to consider:
- Type of sink: Undermount sinks are available in stainless steel, granite, and composite materials, and more. The price for installing stainless steel ones may be less than other materials which are heavier and harder to manage.
- Size of the sink: larger sinks are generally more expensive to install due to the amount of labor and materials necessary.
- The complexity of the installation: Installing undermount sinks without clips can be more challenging and may require additional tools and materials. This can increase the cost of the installation.
- Additional materials: Buying additional materials, such as screws, silicone sealant, and a drill, can add up quickly, especially if you don’t already have them.
- Professional installation: Depending on your location and the complexity of the installation, hiring a professional to install your undermount sink will increase the overall cost of the project.
Conclusion
Undermount sink installation can seem intimidating at first, but with the right tools and a step-by-step guide like this one, it’s a manageable task that can completely transform the look of your kitchen. And when it comes to choosing an undermount sink for your home, look more at famous manufacturers like MyHomeware’s extensive kitchen sinks. With a wide range of styles and sizes to choose from, you’ll find the perfect fit for your kitchen renovation. So don’t hesitate – take the plunge and upgrade to an undermount sink today!
FAQ about Undermount Sink Installation
A solid countertop surface, such as granite or quartz, is required to support the weight of the sink. The sink must also be compatible with the countertop material and have proper mounting hardware.
A bead of silicone sealant should be applied between the sink and countertop prior to installation to ensure a proper seal. Additionally, the sink should be properly clamped or screwed into place to ensure a secure fit.
The amount of weight an undermount sink can support depends on the material of the sink and the countertop, but most undermount sinks can support the weight of a full sink of water and dishes without any issues. It is always recommended to check the manufacturer’s weight limit before installation.