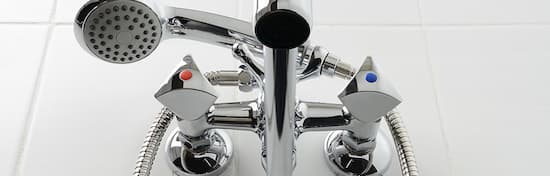
Shower taps are essential to any bathroom, but they can wear out over time or become outdated. If your shower taps are leaking, difficult to turn, or don’t match your bathroom decor, it may be time to replace them. However, the thought of how to replace bath taps against a wall can be daunting, especially if you’re not a DIY expert. That’s why we’ve put together this step-by-step guide to teach you how to change taps in shower with ease. This article will cover everything you need to know about replacing shower taps, including the tools you’ll need, and the steps to follow. By the end of this guide, you’ll be equipped with the knowledge and confidence to replace your shower taps and upgrade the look of your bathroom. Let’s get started!
Tools You Will Need
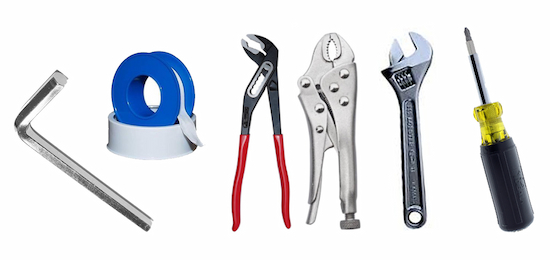
Replacing shower taps may seem daunting, but it can be a simple DIY project with the right tools. Before attempting to replace shower taps, ensure you have the proper tools and materials.
- Adjustable wrench
- Screwdriver
- Allen key
- Pliers
- Plumbers tape
Steps to Replace Shower Taps
Now that you have the tools, it’s time to start replacing the taps in your shower. Follow the steps for replacing taps in shower carefully to ensure a proper installation and prevent leaks or other issues.
Step 1: Turn off the water supply
Before shower tap replacement, you need to turn off the water supply to avoid any water leakage. The isolation valve is usually located near the water meter or under the sink. Turn off the valve and open the shower taps to release any water remaining in the pipes.
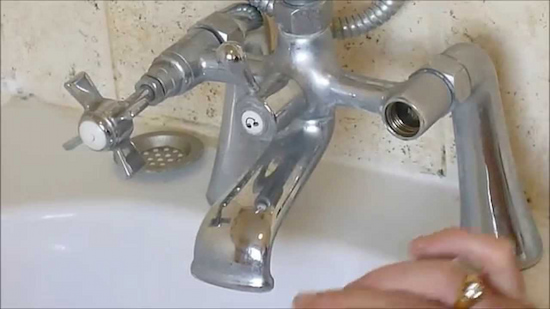
Step 2: Remove the old shower taps
The next step to learn is how to remove shower taps. Depending on the type of tap, you may need to unscrew or pry off a cover plate or handle to access the mounting screw or nut that holds the tap in place. Once you’ve removed the mounting hardware, gently pull the tap away from the wall.
Step 3: Prepare for installation
Before installing the new shower taps, you need to clean the area around the mounting hole and ensure it’s free of debris. You should also check the condition of the pipes and ensure they are in good condition.
Step 4: Install the new shower taps
With the area prepped and the old taps removed, it’s time to install the new shower taps. Place the new taps in the mounting hole and secure them with the mounting hardware. Follow the manufacturer’s instructions for tightening the screws or nuts to avoid damaging the taps.
Step 5: Test the new taps
Once you’ve installed the new shower taps, turn the water supply back on and test the new taps. Check for leaks and ensure the hot and cold water are working properly. If everything is working correctly, you’re done!
Changing Mixer Tap Washer
If you have a mixer tap in your shower, you may encounter leaks or dripping water issues. Sometimes, this can be due to a worn or damaged mixer tap washer, and you will need to know how to replace shower taps. Fortunately, changing the mixer tap washer is a relatively straightforward process that you can do yourself with a few simple tools.
Turn off the water supply: Before you begin, turn off the water supply to your shower. You can do this by turning off the isolation valve or shutting off the main water supply to your home.
Remove the tap handle: To access the mixer tap washer, you’ll need to remove the tap handle. This can usually be done by removing a small screw underneath the handle or on the side of the tap.
Remove the mixer cartridge: Once you’ve removed the handle, you’ll need to remove the mixer cartridge. This can be done using a spanner or adjustable wrench to unscrew the retaining nut that holds the cartridge in place.
Replace the washer: You can now access the tap washer with the mixer cartridge removed. Do not fret about how to change shower tap washer. Just make sure you get a good shower tap washer replacement. Then, carefully remove the old washer and replace it with a new one. It’s essential to make sure that the new washer is the same size and shape as the old one to ensure a proper fit.
Reassemble the tap: Once you’ve replaced the mixer tap washer, you can reassemble the tap. Ensure the retaining nut is tightened securely and the tap handle is reattached properly.
Turn on the water supply: With the tap reassembled, you can turn the water supply back on and test the tap for leaks or dripping water.
Conclusion
Replacing your shower taps can be a simple and rewarding project that can add a fresh look to your bathroom. Learning how to replace shower taps can also save money on plumbing repairs. By following the steps outlined in this article and using the right tools, you can easily replace your shower taps and upgrade the functionality and aesthetic of your bathroom.
FAQ about How to Replace Shower Taps
Yes, You can replace the shower tap by yourself without hiring a plumber. It is relatively easy to change shower taps as long as you have the right tools and follow the steps carefully.
he most common types of shower taps are mixer taps. Mixer taps are a popular choice for shower systems in Australia. They allow you to adjust the temperature and water pressure using a single lever or dial. Mixer taps come in different styles, including wall-mounted or freestanding options, and can be used with electric and gas hot water systems.
Installing a new shower tap in your home can cost anywhere from fifty to five hundred dollars, depending on the complexity of the job and the quality of materials used. However, with the right tools and some DIY skills, you can save money by replacing shower taps yourself.