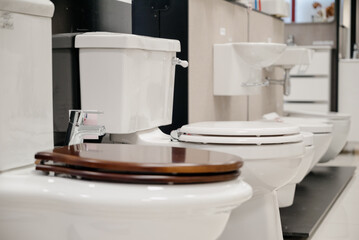
Is it time for you to replace your toilet seat? Your current one might be broken, loose or simply too old. After all, your toilet seat is in use almost daily! If it is, then you’re probably wanting to know how to remove toilet seat with ease. Removing and replacing your toilet seat may sound like a tedious, difficult task, but in reality it is actually quite easy, especially with newer, more modern seats.
And even if your toilet seat is older, popping it off to put in a new one is simple. Our guide on how to remove toilet seats and how to replace them with a brand new one will tell you everything you need to know. So don’t hesitate, let’s dive right in and find out just how to remove a toilet seat!
Tools you’ll need
The tools you’ll need to remove and replace a toilet seat might differ depending on the exact type of seat you have. But in general, the following tools will help you take any type of toilet seat off.
– Gloves: you’re dealing with a toilet, so gloves will help keep nasty germs and bacteria off your hands.
– Masks: just like gloves, this will help you avoid breathing in any germs. It’ll also help mask any smells and odours.
– Disinfectant: it’s important to disinfect your hands before and after removing the seat.
– Cloths: Some disposable or microfiber cloths will be used to wipe down your new seat after installation.
– New toilet seat: for obvious reasons.
– Screwdriver: for removing the screws that hold the toilet seat in place.
– Basin wrench: for removing screws in tight, out-of-reach places.
– Lubricant: for loosening up stubborn screws.
– Socket wrench: for removing stubborn screws.
– Small hacksaw: for removing very, very stubborn screws.
– Putty knife: to help you avoid unnecessary damage if you are hacksawing screws.
– Power driver: for securing screws into place
How to remove modern toilet seats
If your toilet is relatively new (i.e. less than 20 years old), then your toilet seat is most likely to be easily removable thanks to plastic caps. Here’s how to do it:
Step 1 – Open bolt housing
To remove the bolts holding the seat in place, you first need to open the plastic that they are being housed in. Bolt housing is used to hide the unsightly appearance of bolts and screws.
Step 2 – Remove bolts
Once the bolt housing is removed, use a wrench to unscrew the bolts and remove the nuts. If you’re dealing with a tight space or the bolts are too out of reach for your normal spanner, use a basin wrench.
Step 3 – Remove toilet seat
Now that the bolts and nuts are removed, you’ll be able to take the toilet seat right off!
How to remove older toilet seats
If your toilet is of the more older, vintage kind, you might have to put in a little elbow grease to get the toilet seat off. That’s because they usually have metal bolts or metal hinges. No problem though, here’s how to do it easily!
Step 1 – Directly remove bolts
If possible, directly unscrew the head of the bolt with a wrench or basin wrench. If the bolts are a little stubborn or do not unscrew easily, use some lubricant such as WD40 to lubricate them, making them more easily removable.
Step 2 – Using a hacksaw to cut bolts off
If your toilet has incredibly stubborn bolts that simply refuse to be unscrewed, consider using a hacksaw to chop them off. If you decide to use a hacksaw, insert your putty knife around the head of the bolt. This will protect against accidental scrapes and scratches. The narrow working space means using a small or mini hacksaw is greatly recommended.
Step 3 – Remove toilet seat
Once all bolts have been removed, take the seat off. Voila, you know how to remove a toilet seat with metal hinges and how to remove a stuck toilet seat!
Attaching a new seat
The old toilet seat is finally off, time to attach a brand new one. Installing a toilet seat is easy, here’s how:
Step 1 – Read and follow instructions
Every toilet seat is different so it’s important to follow the manufacturer’s instructions on how to attach a toilet seat (if they’ve provided them). Otherwise, follow the general instructions that we’ve outlined below.
Step 2 – Place bolts, screws and nuts
Place the new seat in it’s correct position on the toilet. Place screws inside appropriate holes and new bolts or washers underneath. If the old screws and bolts are corroded, make sure to use new ones.
Step 3 – Drill or screw into place
Use a power driver or flat head screwdriver to secure the screws and bolts into place. For extra bolt security and to prevent loose seats, you can tighten the nuts with rubber bushings.
New toilet seats made easy
And there you have it, out with the old, broken toilet seat and in with a brand new one! Be sure to always maintain your toilet seat with regular cleaning so you won’t have to learn how to remove toilet seats too often! Or you can always buy a brand new toilet! At MyHomeWare, our beautiful toilets will make you feel like a king, sitting on your throne. Head on over to find the best toilet for you now!


