Renovating the bathroom can come as a tough choice. Learning how to remove the shower riser rail can be one of the tasks that you would perhaps need to learn. Even when you are not a Pro, it should be much simple and easy to find how to remove the shower riser rail without hassles. We will learn the simple steps in terms of removing the shower riser rail easily.
What Is A Shower Rail (Shower Riser Rail)?
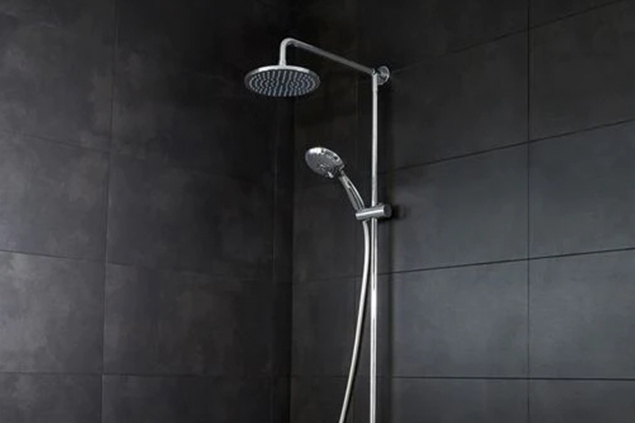
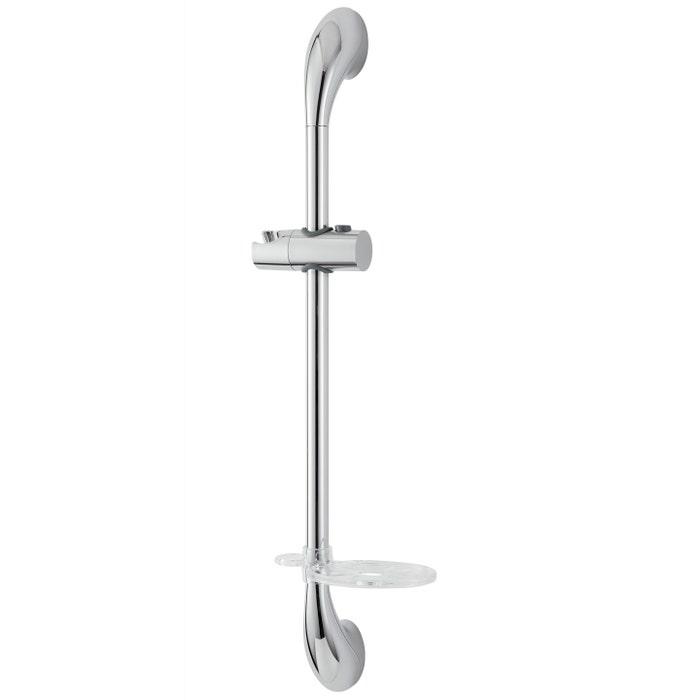
The shower riser rail is also known as shower rigid riser as well. It is a shower room fixture, which is designed to connect the showerhead to the main water outlet. It is a fixture that holds the showerhead and shower arm connected.
The quality of the shower riser rail will be helpful in ensuring the stability of your shower arm and shower head. If you find the quality is not up to the mark, you would perhaps need to remove the shower riser rail.
How To Remove Shower Riser Rail?
In this section, let us check out the step-by-step details on how to remove the riser rail efficiently.
The Tools You Need
To remove shower riser rail, you will need to have the following tools –
- A Philips screwdriver
- A Flat screwdriver
- Oil or lubricant
- Drilling machine
- An Allen wrench
- Cardboard
- Hammer
The Step-By-Step Guide
Removing the shower riser rail should be much easier. You would find it fixed with a very simple mechanism, making it rather easy to remove.
Step 1 – Unscrew the bolts on the rail
The first step how to remove shower riser rail is to remove the bolts. You will need to use the Philips screwdriver to remove the bolts and a flat screwdriver for lifting off the rail. Make sure that you are not damaging the rail.
Step 2 – Clean off the rust
The shower fixtures generally stay in contact with the water. This is exactly what causes the accumulation of dust. Spray the area with lubricant and oil to dismantle the rust. That way, you will be able to completely remove the rust on the rail, and regain the luster.
Step 3 – Clean up the screws
The next step would be to clean up the screws. The grime and dust are likely to accumulate on the screws as well. You can brush them with lubricant. You can also use the anti-rust lubricant to ensure that the screws do not catch rust in the future – at least for a considerable time ahead. Scrape off the rust if possible. If the screws are not properly aligned, you can use the Allen wrench to set them right.
Step 4 – if needed, use a hammer to loosen up the rail
In case the rail is difficult to remove, you can use a hammer to loosen them up. The glue that attaches the rail can be quite tough to remove at times. Make sure that you are not using the hammer with a vigorous force. You would not want to damage the rail or any of its components. You may also use the hammer to straighten the rail if you find it bent in any way.
Step 5 – Detach the riser rail from the wall
Once you have gone through all the tasks carefully, now it’s time to pull off the rail from the wall. Make sure that you have removed the glue and joints properly. Remove the residues and take care to remove the rail from the wall carefully.
Cannot Remove Shower Riser Rail? These Can Be Your Reasons!
If you find that the Shower riser rail is not easy to remove, it can be due to a host of reasons. You will need to diagnose the exact reason to find what is causing the issues.
Some of the reasons here can include
Rusted joints – This can be caused by water droplets. The moisture in the bathroom can also be a reason for the issue. Make sure that you have kept the bathroom exhaust turned on. Do not shut down the bathroom door.
Hidden grub screws – The rail may have a few hidden grub screws. Try to find them and remove them. Once that is done, you should be able to remove the rail easily.
The Concluding Thoughts
The steps involved in how to remove the shower riser rail can be quite easy if you follow the steps quite carefully. You will be able to achieve the task with a professional level of expertise if you are able to follow the steps that we have outlined above carefully. And after you remove the old shower riser rail, you will need a new one to replace it. It’s highly recommended to find it in MyHomeware shower riser rails, which are made of high-quality material and have a warranty of 5 years.
FAQs About How to Remove Shower Riser Rail
You will need to turn off the bathroom faucet. There is no need to turn off any other water connection.
One method is to grab the base of the shower head that’s connected to the pipe, and twist it back and forth slightly at first. Then, once you have made some progress, increase your grip on the base and give it more vigorous twists in alternating directions. You could also attempt to unscrew it with just your hands and fingers by digging into its grooves. But it may be quite difficult and challenging to loosen the shower riser rail without the right tools.
The first step when attempting to tighten a shower head holder is to locate the source of the problem. Often, the threads may be worn out or corroded, so it is important to inspect and clean the part before you begin. If that does not solve the problem, you may need to replace the holder entirely or try using a pipe thread sealant. Sealing any gaps between the shower head holder and the wall can also help make sure it stays in place securely for long periods of time. Above all, never use an excessive amount of force as this can cause additional damage!