Diffusers are an easy and inexpensive way to add a spa-like feeling to any room by using essential oils. Making a diffuser at home is a great way to transform your space and make it more inviting. The process may seem intimidating, but with the right guidance, you’ll be able to construct your own diffuser in no time. In this blog, we’ll give you a comprehensive guide about how to make a diffuser by yourself.

Steps to Make Your Own Diffuser
How to make an oil diffuser? Here’s what you should do to make your own diffuser:
Step One: Gather Your Tools
For this project, you’ll need a few items: an empty glass jar or bottle, essential oil of your choice, unscented baby oil, rubbing alcohol or vodka, and bamboo skewers or diffuser reeds. You’ll also need some equipment: scissors or a box knife, a bowl, and a small funnel. For other supplies, it depends on what type of diffuser you want to make. For example, if you want a more decorative look, you can also add beads or other decorations to the jar.
Step Two: Prepare the Base
In a bowl, mix together equal parts of unscented baby oil and rubbing alcohol or vodka. This will be your diffuser base. If you want to add color to your diffuser, you can also add a few drops of food coloring at this stage. Pour the mixture into the empty jar or bottle.
Step Three: Add Essential Oils
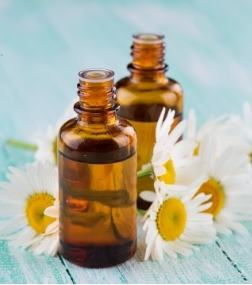
Using a funnel, add 10-15 drops of your favorite essential oil to the diffuser base. You can mix and match different oils for a unique scent, or use just one if you prefer. People often choose calming or uplifting oils like lavender, chamomile or eucalyptus.
Step Four: Place the Skewers or Reeds
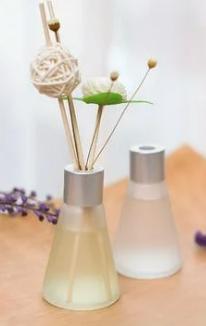
How to make a reed diffuser? Take your bamboo skewers or diffuser reeds and cut them into pieces of equal length, about 4-6 inches long. Place the pieces in a bowl and pour rubbing alcohol over them to help the essential oil absorb better. Allow the reeds to soak up the liquid completely before placing them in the diffuser base. And wait for 10-15 minutes for them to absorb the scented oil. Then the oil diffuser sticks can be put into use. You can use them more than once, just make sure to rinse them in between uses.
Step Five: Enjoy Your Diffuser
After allowing your diffuser to sit for a few hours, you can now enjoy the scent of your new homemade aromatherapy device! Place it in any room and enjoy its relaxing aroma. To help keep the scent strong, make sure to flip the reeds every few days.
Tips for Making Room Diffusers
- Always use glass containers for your DIY difuser so that the essential oils won’t interact with any other materials.
- Use unscented baby oil as a base, as it will prevent the essential oils from evaporating quickly.
- Don’t add too many drops of essential oil or else the scent may become overpowering.
- Keep your liquid diffuser away from direct sunlight and heat sources, as this can weaken the scent.
- Ensure that the containers are checked and replenished with liquid on a monthly basis, and be sure to mix up the contents using a stick for the best results.
- Flip the reeds every few days to help maintain the scent of your diffuser.
- If you notice the scent fading, add more essential oils to the fragrance oil diffuser base.
- Make sure to clean your homemade diffuser regularly and replace the reeds or skewers when necessary.
- Be creative with design and decorations! Use beads, ribbons, or anything else that matches your diffuser bedroom decor.
- Be careful when cutting bamboo skewers or diffuser reeds to make sure you don’t hurt yourself.
- Have fun and experiment with different essential oil combinations. You can even mix in some dried herbs or flowers for a unique scent!
Conclusion
Making a DIY room diffuser with perfume is an easy and inexpensive way to fill any room with a beautiful aroma. With the comprehensive steps and tips, I think you have had a better understanding about how to make a diffuser. So go ahead and get creative with design, decorations, and scents to create the perfect oil scent diffusers that fit your style! Have fun and make sure to keep experimenting until you find the perfect combination! Enjoy!
FAQ about How to Make a Diffuser
If you’ve followed the steps and your homemade reed diffuser doesn’t smell, it could be because the essential oils are not getting absorbed by the reeds. Make sure that you soak the bamboo skewers or diffuser reeds in rubbing alcohol for at least 10 minutes before adding them to the diffuser base. This will help them absorb the essential oils, which will lead to a stronger scent.
If you want to make your diffuser smell stronger, you can add more drops of essential oil. However, keep in mind that too much oil can lead to an overwhelming scent, so it is best to start with a few drops and add more if needed. You can also flip the reeds every few days to help keep the scent strong.
This will depend on the type of essential oils you are using, but in general, a homemade diffuser should last for several weeks. To maximize the lifespan of your diffuser, make sure to clean it regularly and replace the skewers or reeds when necessary.