A kitchen sink is an essential component of any household, and whether you’re remodeling your kitchen or just replacing an old sink, installing a new one can be a rewarding and relatively straightforward project. This comprehensive guide will walk you through everything you need to know about installing kitchen sinks, including whether you can do it yourself, what materials are required, the specific steps of how to install a undermount kitchen sink, and more!

Can I Install a Kitchen Sink Myself ?
Frankly speaking, it is possible to install kitchen sinks yourself even though it can be a challenging and time-consuming task, especially if you don’t have experience with plumbing or home improvement projects. That’s because installing a kitchen sink requires connecting the sink to the water supply and drainage pipes and sealing it in place. You will need specialized tools and materials, including a wrench, a plumber’s putty, and silicone sealant.
So if you want to install it yourself, we advise you to carefully follow the manufacturer’s instructions and local plumbing codes to ensure proper installation and avoid any potential leaks or damage to your home. If you don’t feel comfortable with the process, or if you encounter any unexpected issues, it’s best to seek the help of a professional plumber or handyman to ensure a safe and efficient installation.

Consider the Space You’re Working With
Before you begin the installation process, it’s important to consider the space you’re working with. Here are some things you should keep in mind when planning your kitchen sink project:
1. Check the size and dimensions of your existing kitchen: This can help you choose a proper sink size that will fit seamlessly into your existing bench space.
2. Measure Twice, Cut Once: Before installation, take accurate measurements of the area where your sink will be installed to make sure it fits properly.
3. Check for Leaks and Cracks: Look for any visible signs of damage that may affect the installation, such as leaks or cracks in the existing plumbing.
4. Consider Your Plumbing Layout: Pay attention to how your plumbing is laid out so you can install the sink in a way that makes sense for you and your home.
What Do I Need To Install a Kitchen Sink
In order to successfully install kitchen sinks, you will need the following materials:
1. Sink and Faucet: Choose a sink that’s the right size and shape for your project. Make sure it comes with all the necessary fittings, such as faucets, drain flanges, etc.
2. Plumber’s Putty: This is used to create a water-tight seal around the sink drain flange.
3. Silicone Caulk: Use this to seal up any gaps or cracks between the sink and countertop surface.
4. Wrench: A wrench will help you tighten nuts and bolts when attaching the faucet to the sink.
5. Plumber’s Tape: This is used to prevent leaks around the pipe threads.
Kitchen Sink Installation in 6 Steps
Now that you have all the materials and tools necessary to install your kitchen sink, it’s time to get started. No matter you want to know how to install a undermount sink on granite countertops, how to install a drop in kitchen sink, or how to arrange kitchen sink plumbing, here are five steps to help you complete the job:
1. Remove the Old Sink: Start by turning off the cold water supplies, then use an adjustable wrench to disconnect the supply lines and the drainpipe that connects to the house sewage system. Make sure to drain any remaining water from the sink and place a bucket underneath to catch any drips.
2. Place the Sink in Position: Place the sink in position, and make sure the new sink matches the existing cut-out and the waste pipes align correctly.
3. Create a Water-Tight Seal: Apply the plumber’s putty around the sink drain flange to create a water-tight seal.
4. Caulk Around the Sink: Once the plumber’s putty is in place, use silicone caulk to seal up any gaps or cracks around the sink. Allow it to dry completely before moving on to the next step.
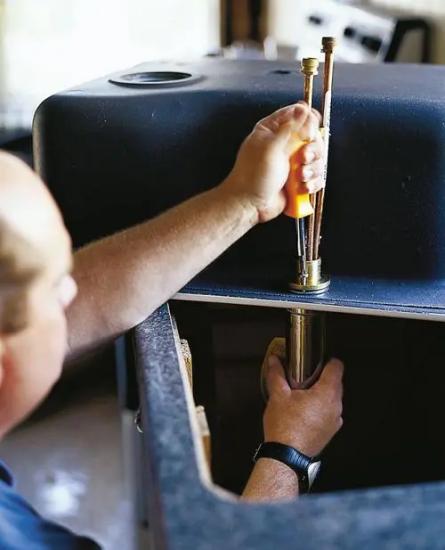
5. Install Plumbing Fixtures: Next, attach all of the plumbing fixtures, such as the drain flange and waste pipework. Use a wrench to tighten any nuts and bolts as needed.
6. Connect Water Supply Lines on New Sinks: The last step is connecting the water supply lines and testing out your newly installed kitchen sink! Make sure all connections are secure and there are no leaks before using them.
Conclusion
Installing a kitchen sink is very important to ensure a comfortable use later. Knowing the steps of how to install a kitchen sink in Australia and what materials you need are key in this process. Keep in mind the space you’re working with, measure twice, cut once, and use the step-by-step guide provided as a helpful resource when completing your project so you can achieve professional results without having to break the bank! With these tips, you should have no problem installing your own quality single bowl or double bowl kitchen sink!
FAQ About How To Install a Kitchen Sink
The specific cost of how much to install a new kitchen sink varies depending on the type of sink and if any additional materials are needed. You can expect to pay anywhere from $150-$1500 for professional installation. If you choose to install it yourself, you will only have to cover the cost of the sink.
Regarding how to install a kitchen sink in a new countertop, it is generally best to install the countertop before proceeding with sink installation. This will make it easier to access any plumbing fixtures or connections that need to be made. The sink is then placed 24 hours after the countertop has been installed.
Yes, it’s important to caulk between the sink and countertop to ensure a water-tight seal. A faulty seal can mean drastic consequences, allowing water to seep beneath the rim of your sink and wreak havoc on its integrity. Silicone caulk is recommended for this purpose.